Mobility app
A B2B navigation application for taxi drivers (2018). Be the fastest and smoothest dispatch platform
Mobility Drive app
Company: Here Technology
Role: Senior UX&UI designer
Background
Mobility Drive is an application for taxi drivers, allows them to get rides and manage their shifts. The driver is connected to the dispatch system and part of the taxi station. The dispatcher in the station adds rides to the system and they sent to the relevant driver (depends on distance and some constraints that I will talk about them later, like the number of passengers, ability to take people with disabilities, or the number of baby seats needed).
As part of my work at Here Mobility I took part by designing the main app flows and use cases such as:
1. Login authentication flow
2. Change driver status
3. Get a new ride
4. Ride flow (while driving to and with the client)
5. Settings and about pages
6. Upcoming rides and rides history
7. Alerts, and messages in the app
Challenge
I joined to the branch of Here Mobility from the beginning of its establishment. It means that I planned and designed the iOS and Android applications from scratch while we had the general idea of the product.
Another challenge is to combine the right flow for two different platforms, web dispatch system and native applications. These are two different products, for different users but should communicate with each other.
The last challenge (but not least) refers to the targeted users who will use the application while driving. In each pixel in the application I took into consideration that users interact with the app while driving, meaning the users are not in their full attention for the app. All the flows and screens should be clear and usable while doing another activity in the background, especially the ride flow.
First flow / Login
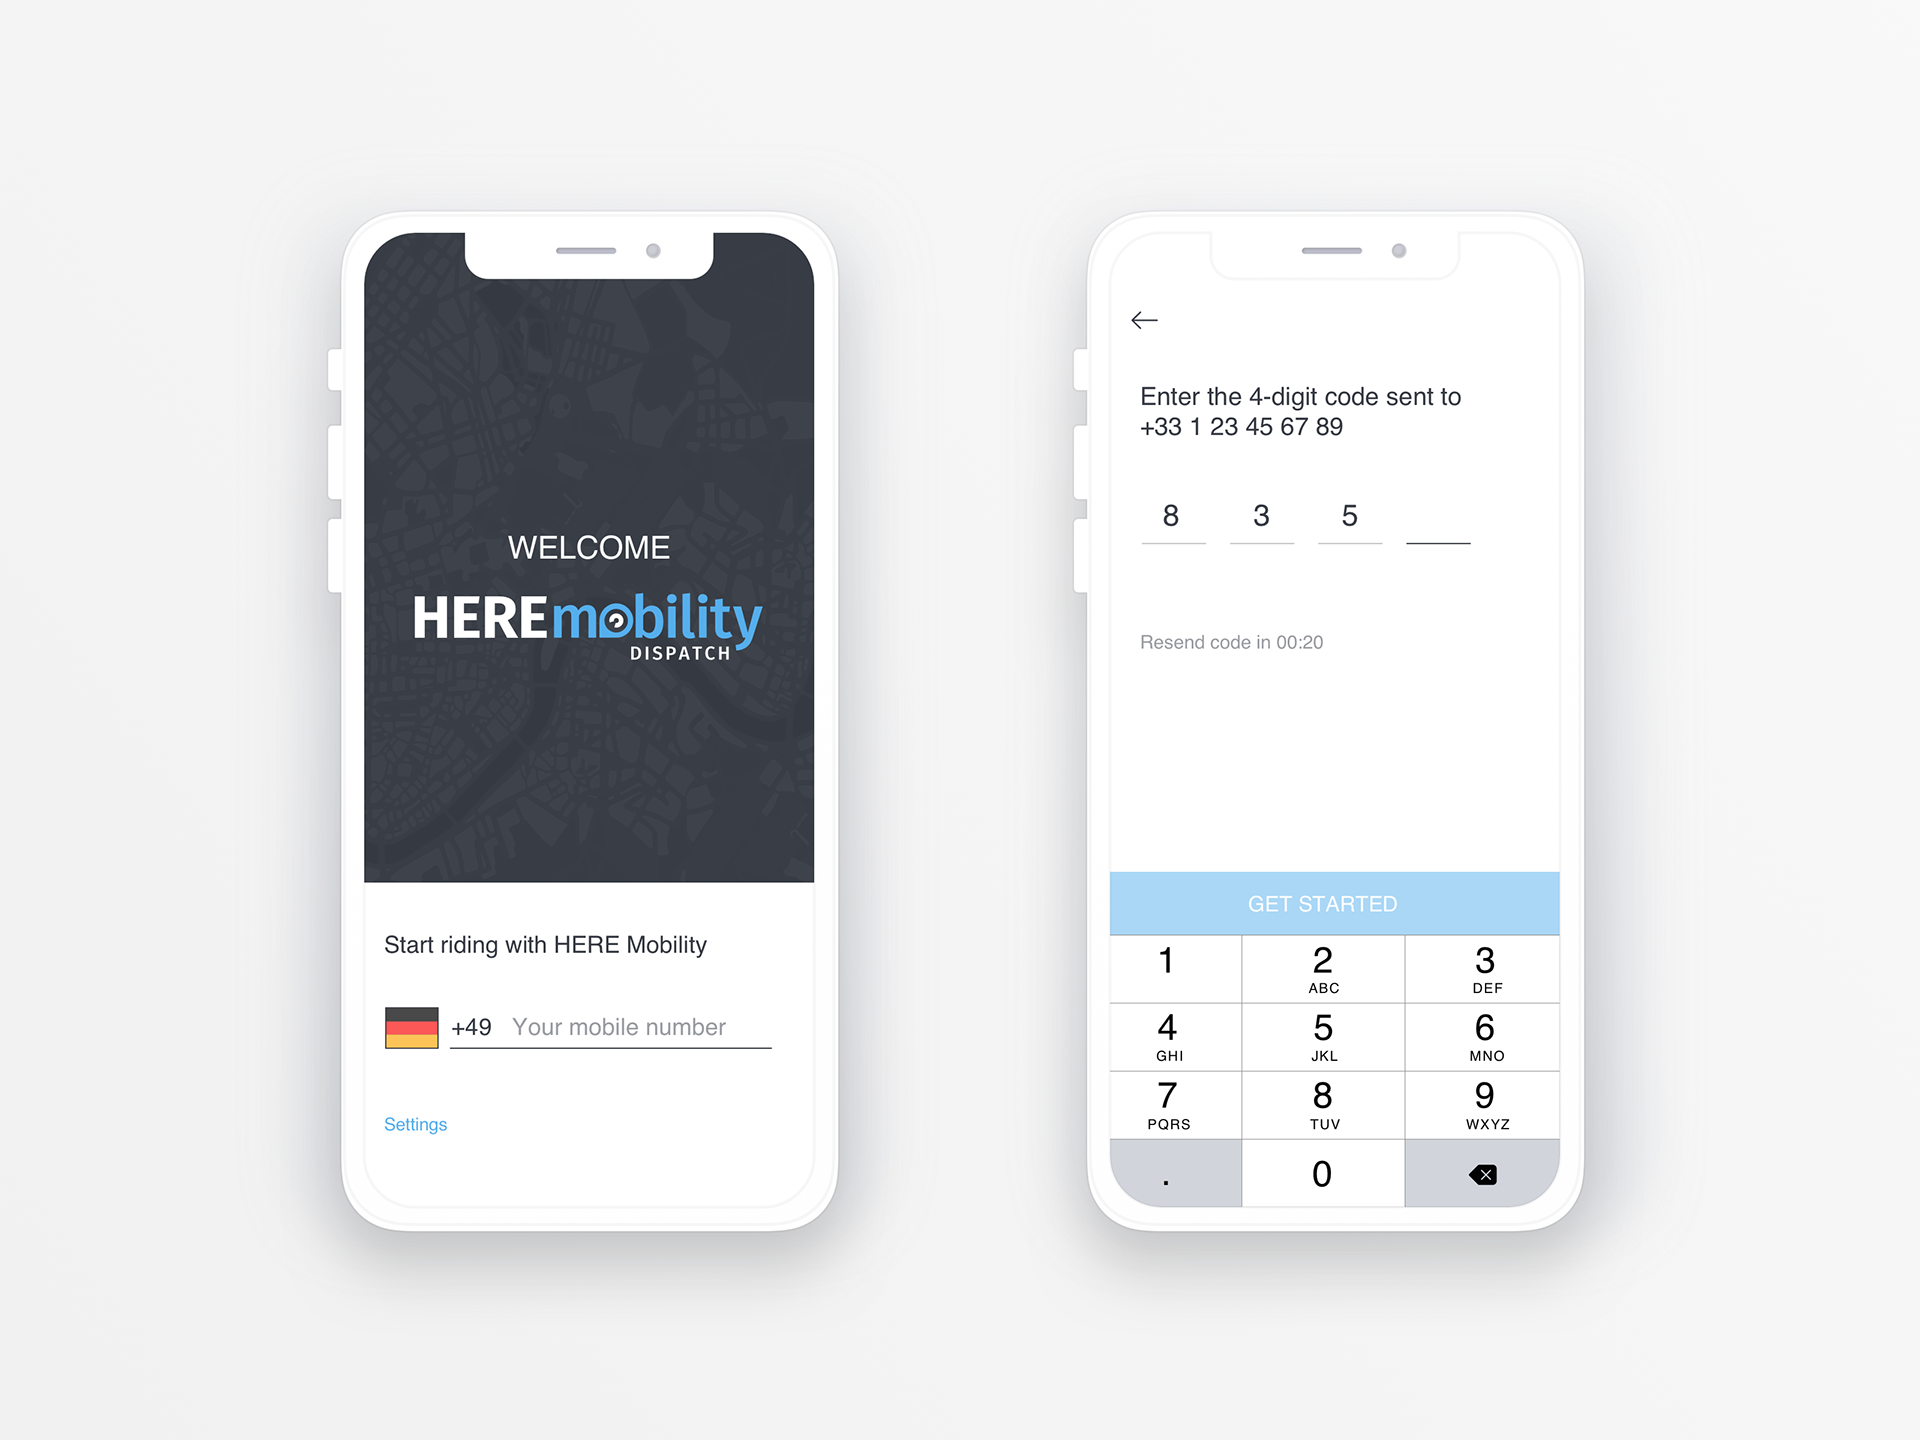
This flow is the most complicated login flow I have ever worked on. The reason for that is because the user had to be registered first in the taxi station dispatch system before he will be able to login to the app. After adding a driver, the driver gets an SMS with a link to download the app. All the application's users should be login with their phone number to be able to get the rides from the relevant station they are connected to.
In this case, while the phone number is the unique ID for the user, the driver is able to connect to the application by the same ID, phone number. For security matters, the users should enter 4 digits code they receive by SMS to login to the app, after entering the phone number.
The login flow has two steps only, as you can see below. Reaching to this great experience was not an easy task as it seems. We tackled several scenarios and flows, when the email was the unique ID and with a unique ID that the web dispatch system generated. Even that it was easier to implement other options, we found this idea short, indicative and clear for users.
Second flow / Change driver status
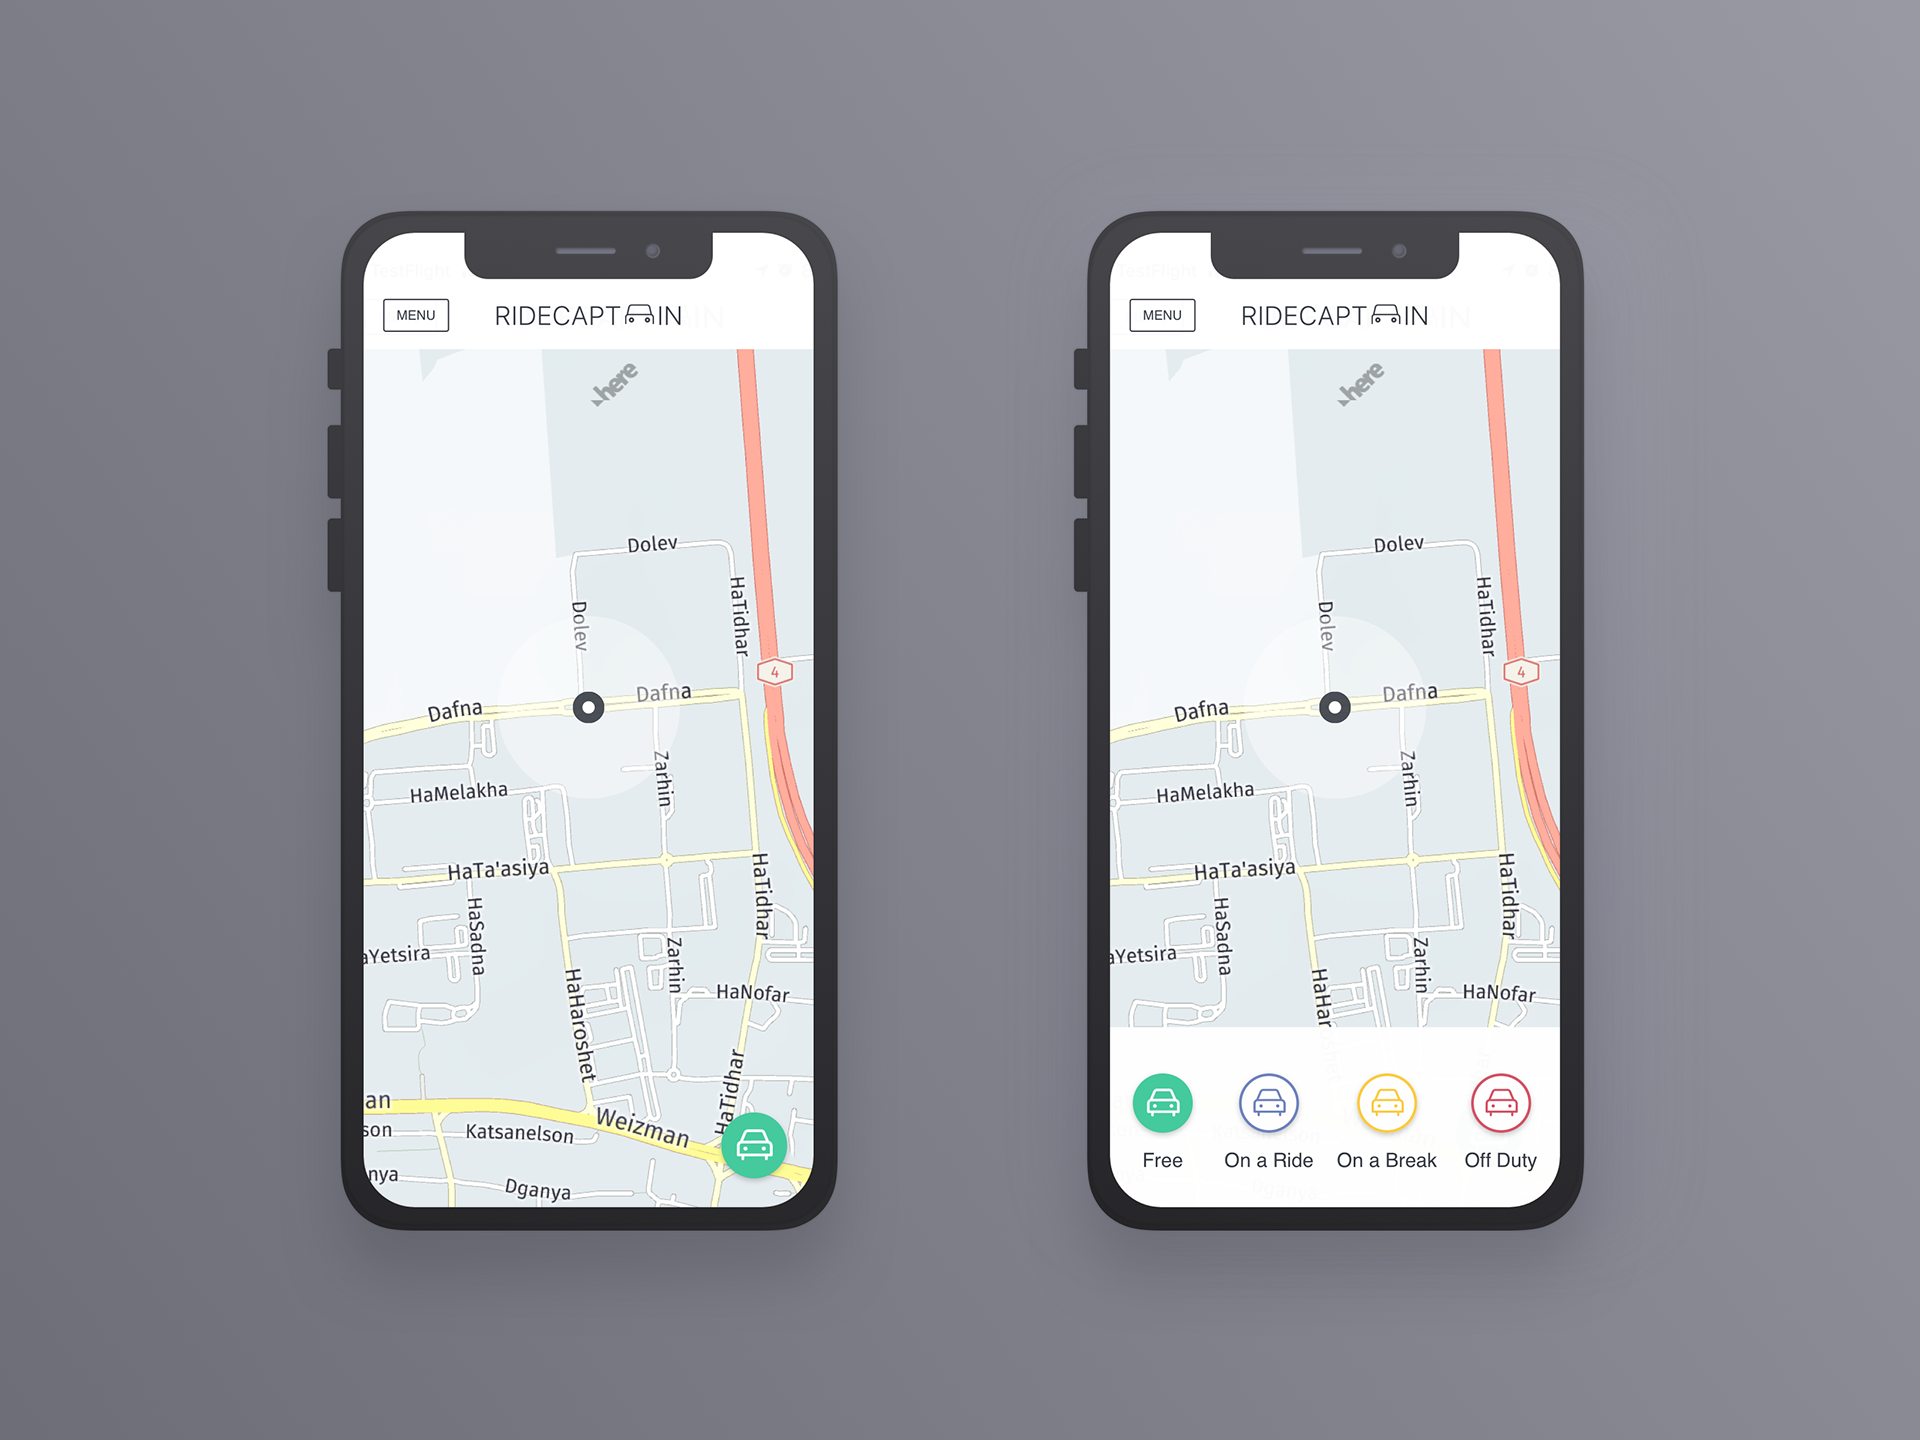
Each driver has the ability to manage their shift as they like, it means to decide when to be 'online' and when the driver wants to get rides from the dispatch system. There are 4 statuses the driver could change:
1. Free: Means the driver in the car waiting for rides to arrive, the driver is available to get rides and searching for street-hailers.
2. On a ride: Means that the driver is on shift but is busy, the driver can get pre-booked future rides but not immediate rides.
3. On a break: This means that the driver is on shift but cannot get rides right now (e.g. because of car mechanical problem).
4. Off duty: This means the driver is not on shift and will not get rides from the dispatch system.
The location for these four statuses is reachable and the user can do it by one click from the main app screen. By clicking on the car icon, the user can choose which status to change, the change will be sent to the taxi station dispatcher, and the connection between them is automatic, immediate and in real-time.
While drivers changes the status to be "On a Ride" it means that they took a ride with the street hailer and they are busy. While clicking on this status the Street Hail page will open a modal page and the driver will be requested to insert destination address. The pickup point will be always the current location but the user can change it if he needs, this is something that we learned and improved from design iterations: Instead of letting drivers to add the current location manually, we used the GPS and the address will be field automatically. All the rest information on the page is not mandatory, to make the flow as sort as possible, set destination, and go!. While clicking on the "Ride" button the driver will see a navigation to the destination (same as described in the forth flow).

Third flow / Get a new ride
While drivers are on their way on the road, they need to be updated when a new ride arrives at the dispatcher in the taxi station. The rides will appear on their screen for several seconds and if the driver will ignore it, it will disappear and will be presented to another driver, until one of them will approve and take the ride. The system works this way, to always allow the closest driver to take the ride, if they available. It is a win-win situation, the driver needs to drive less to the pick-up location, and the driver will start the ride as soon as possible, meaning reaching to the client faster. Making the new ride request disappear after a while (indicated by a timer) to helps drivers ignore requests without clicking on the screen, less clicks-much better and safer.
This screen includes a lot of information, therefore, coming up with this flow was quite challenging. The new ride request designed to be all over the device screen (a modal which arrives from the bottom of the screen) and the driver could:
1. Accept the ride and start the navigation: Users could click anywhere on the screen to accept it, this behaviour made to make the acceptance of the ride much easiest instead of clicking on a specific button on the screen. While driving it makes more sense to click all over the screen area (except the 'Reject' button area) to accept the ride.
2. Reject the ride: By clicking on the 'Reject' button, the driver will be back to the main screen. The rejection will make this ride to be sent to another available driver.
3. Ignore the ride: This screen will disappear from the screen while the timer will end (the timer moves from left to right, full to empty).
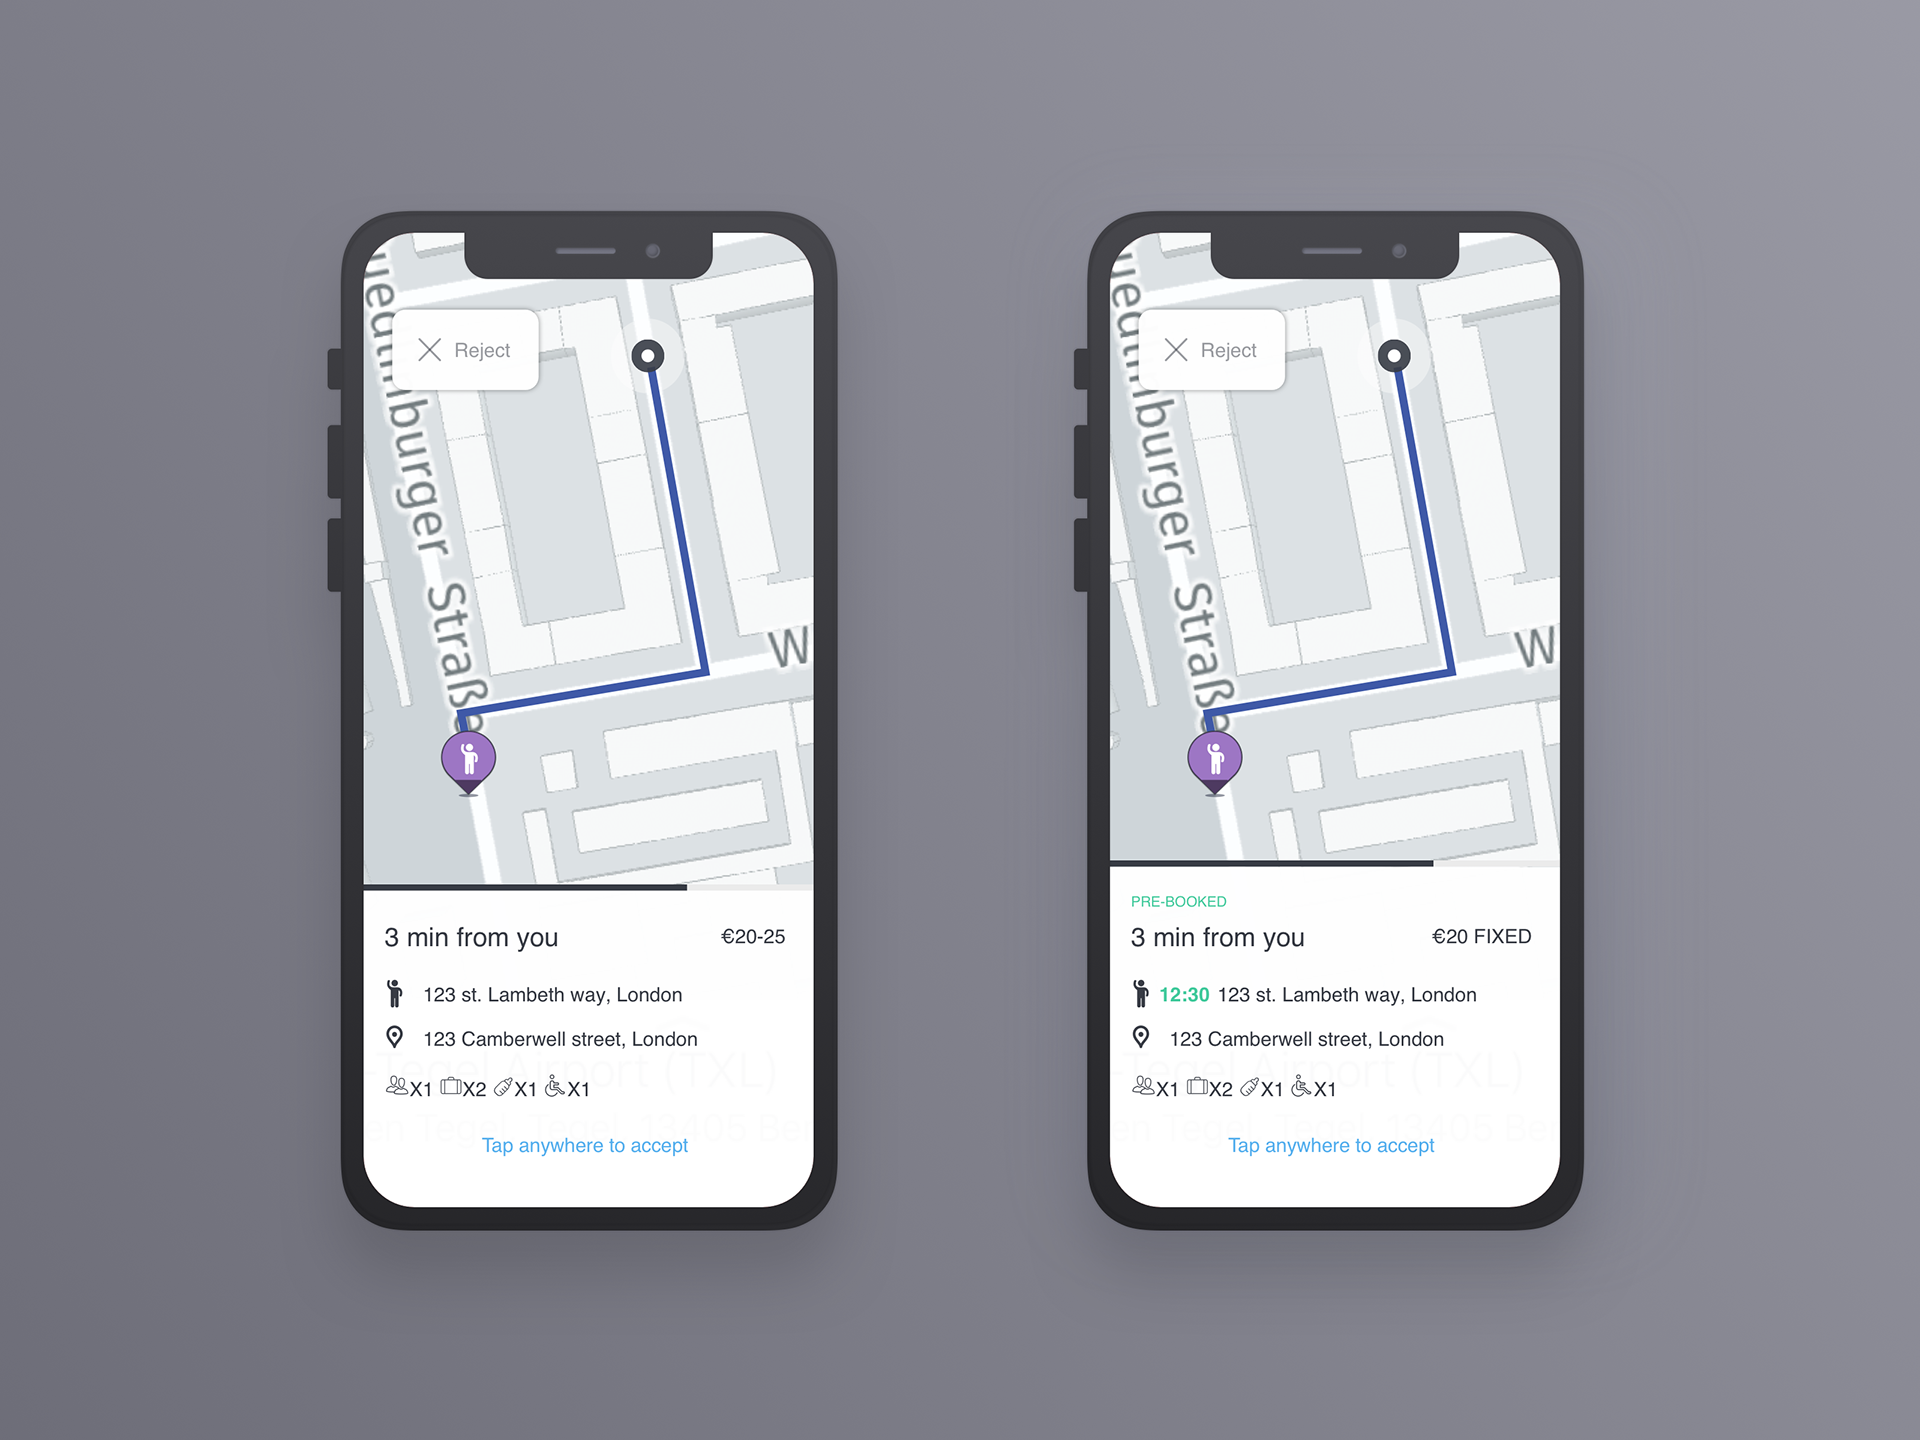
In the screen above, on the right-hand side, there is a ride which is pre-booked. Pre-booked rides has been asked hours or days before the actual ride. The price, in this case, is fixed, which means that the dispatcher in the taxi station has decided a price with the client for this ride, and this is the amount of money the driver will receive from the client at the end of the ride.
In the new ride request the driver should be notified, in addition to the pickup point and destination addresses, about the constrains of the ride. In the example above, the driver is notified that the ride is for 1 person, which has 2 suitcases and a baby (needs a baby seat) and this person may have a physical disability. All this information appears on the new ride request.
Forth flow / Ride flow
While drivers accept rids, they will see instructions on how to reach the passenger pickup point. On the header drivers will see instructions how to reach the pick-up point. We decided to use this known patterns which appears on all navigation applications, like Waze and Google Maps. On the bottom part of the screen, the driver always sees how much time it will take to arrive to the pickup point (e.g. "4 min"), what is the arrival estimation hour (e.g. "09:45") and what is the distance (e.g. "1.7 km").
While the driver is near the pickup address, the drawer will move up a bit and he will see the button of reaching to the passenger. When drivers arrive at that point, they can click on this button. If the drivers will not click on this and will start to drive, the application will direct them to the destination point automatically.
To see more information and reach more functionalities which relevant to the ride, divers need only to swipe the drawer upward. By doing so, drivers will be able to call the passenger or dispatcher, turn on or off navigation sounds or cancel the ride.
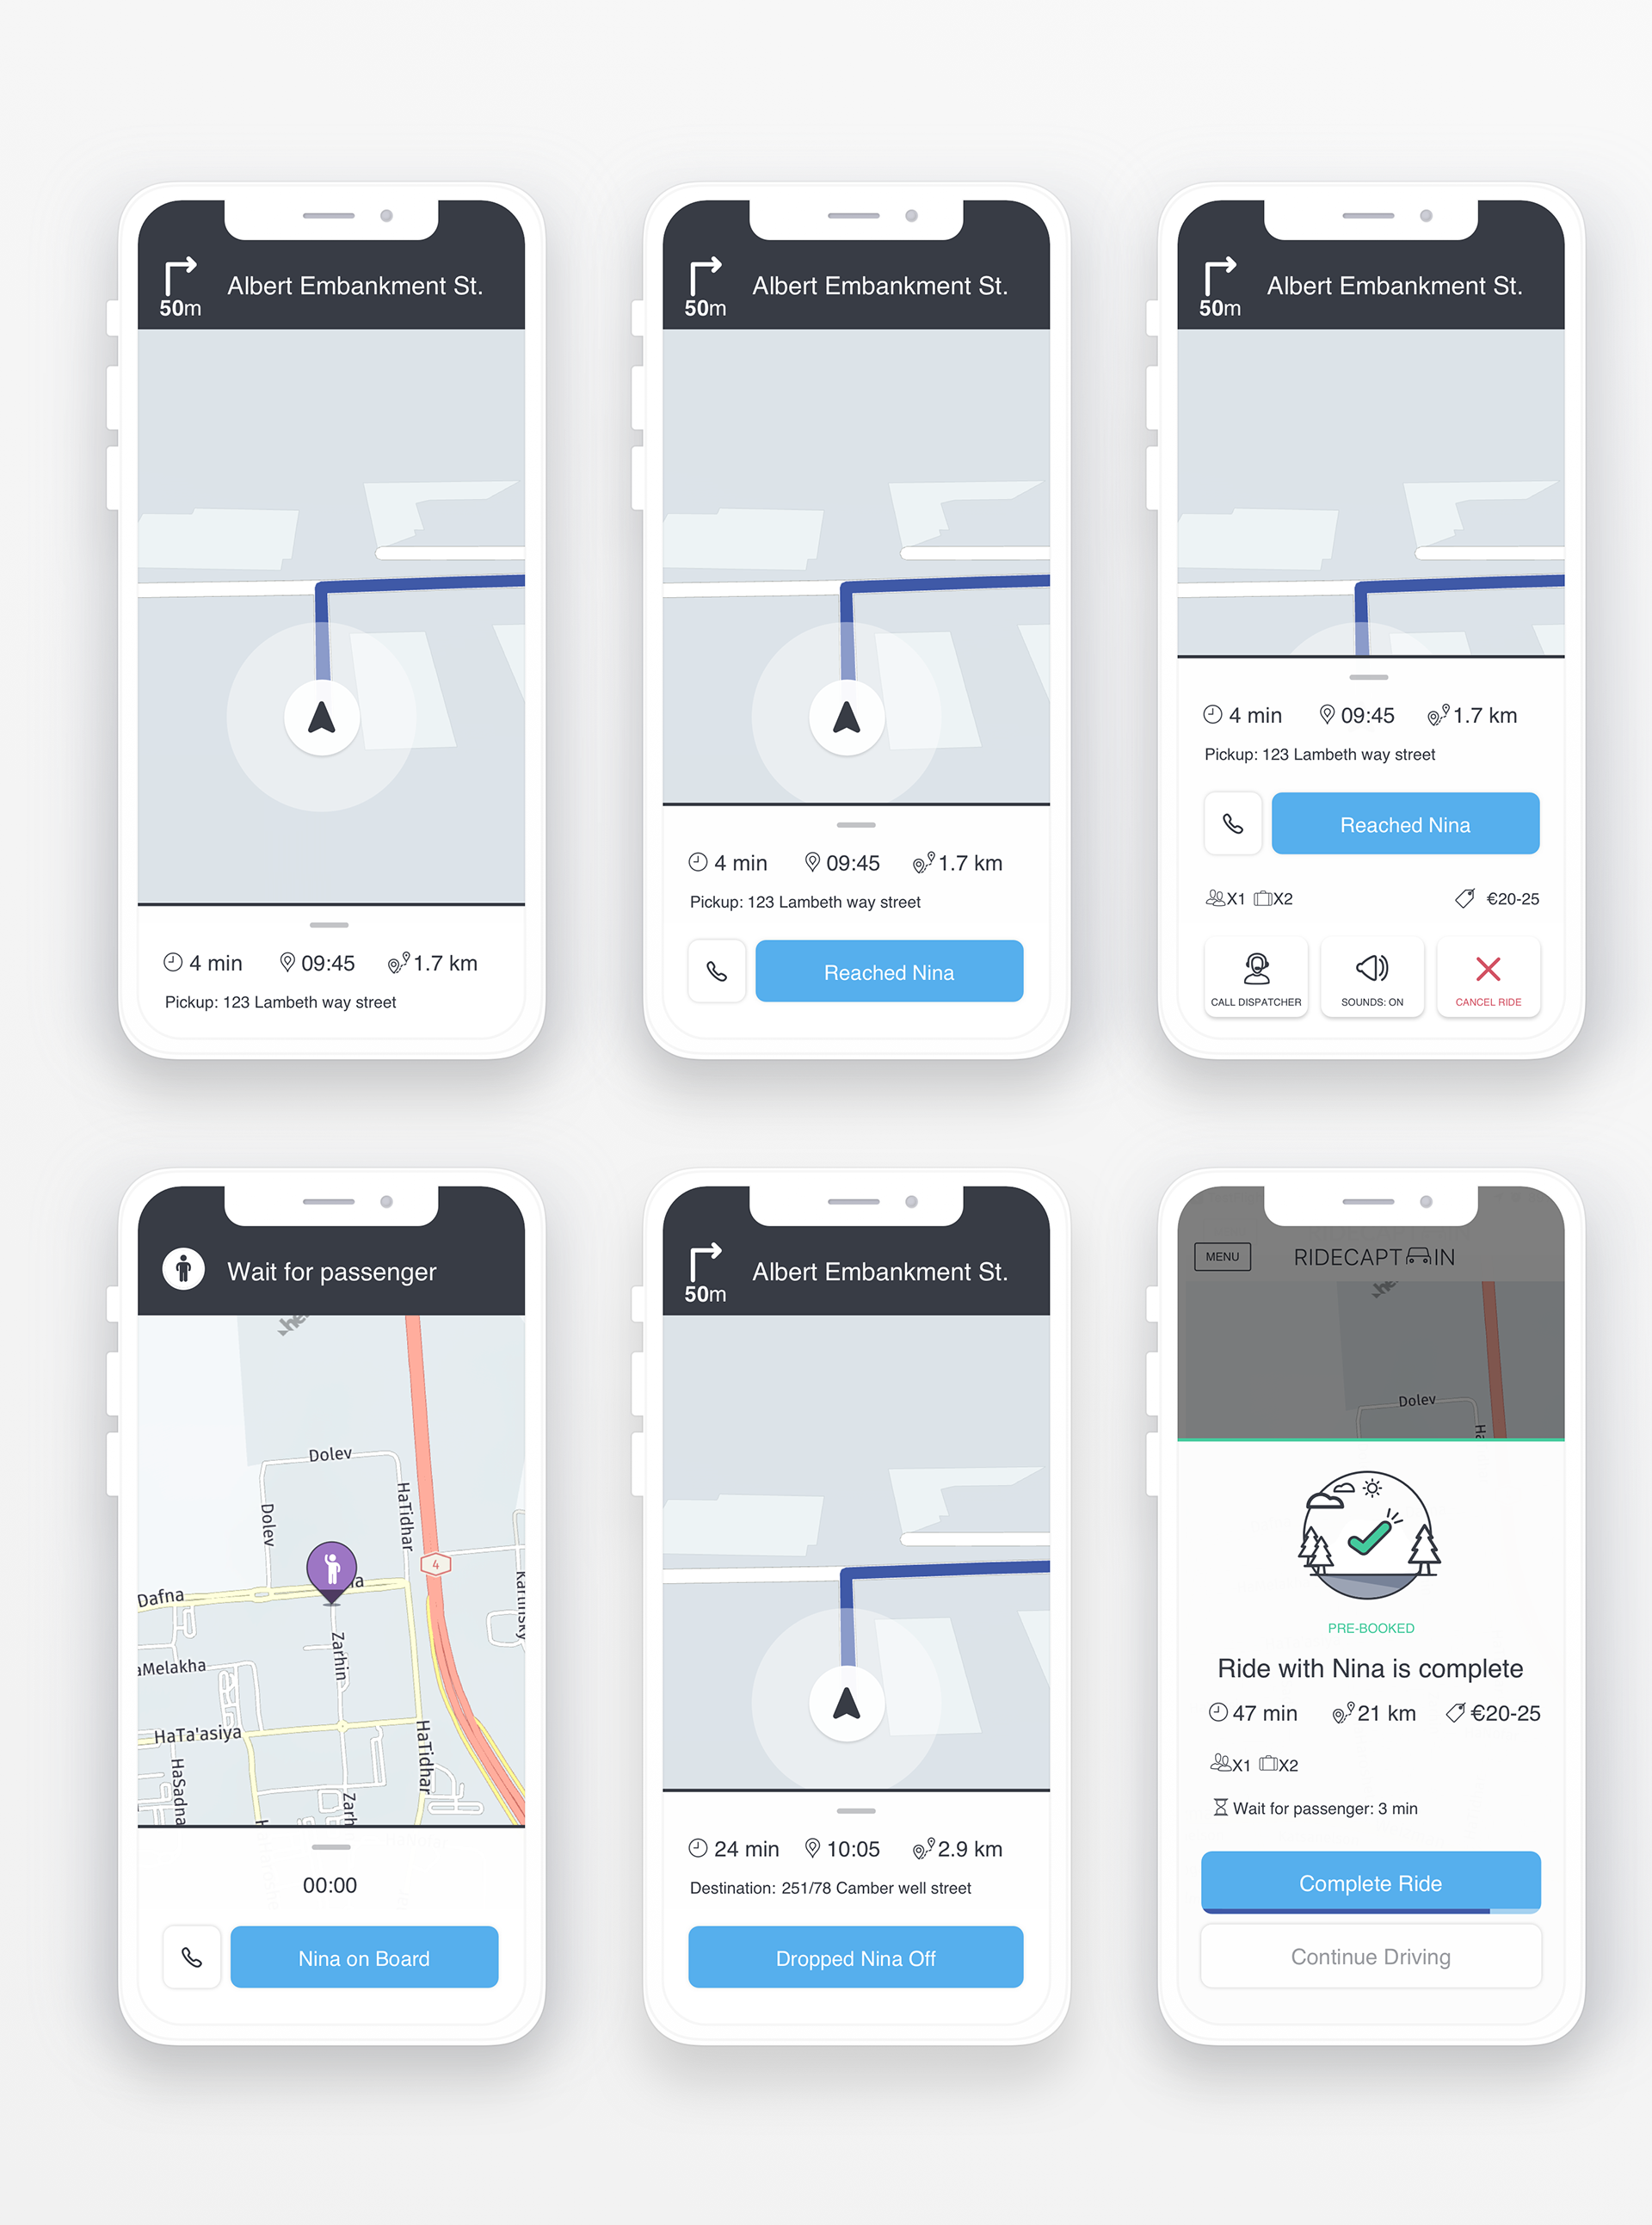
We generated new fresh icons for the manoeuvres appear on the header which driving:

Fifth flow / Settings and about pages
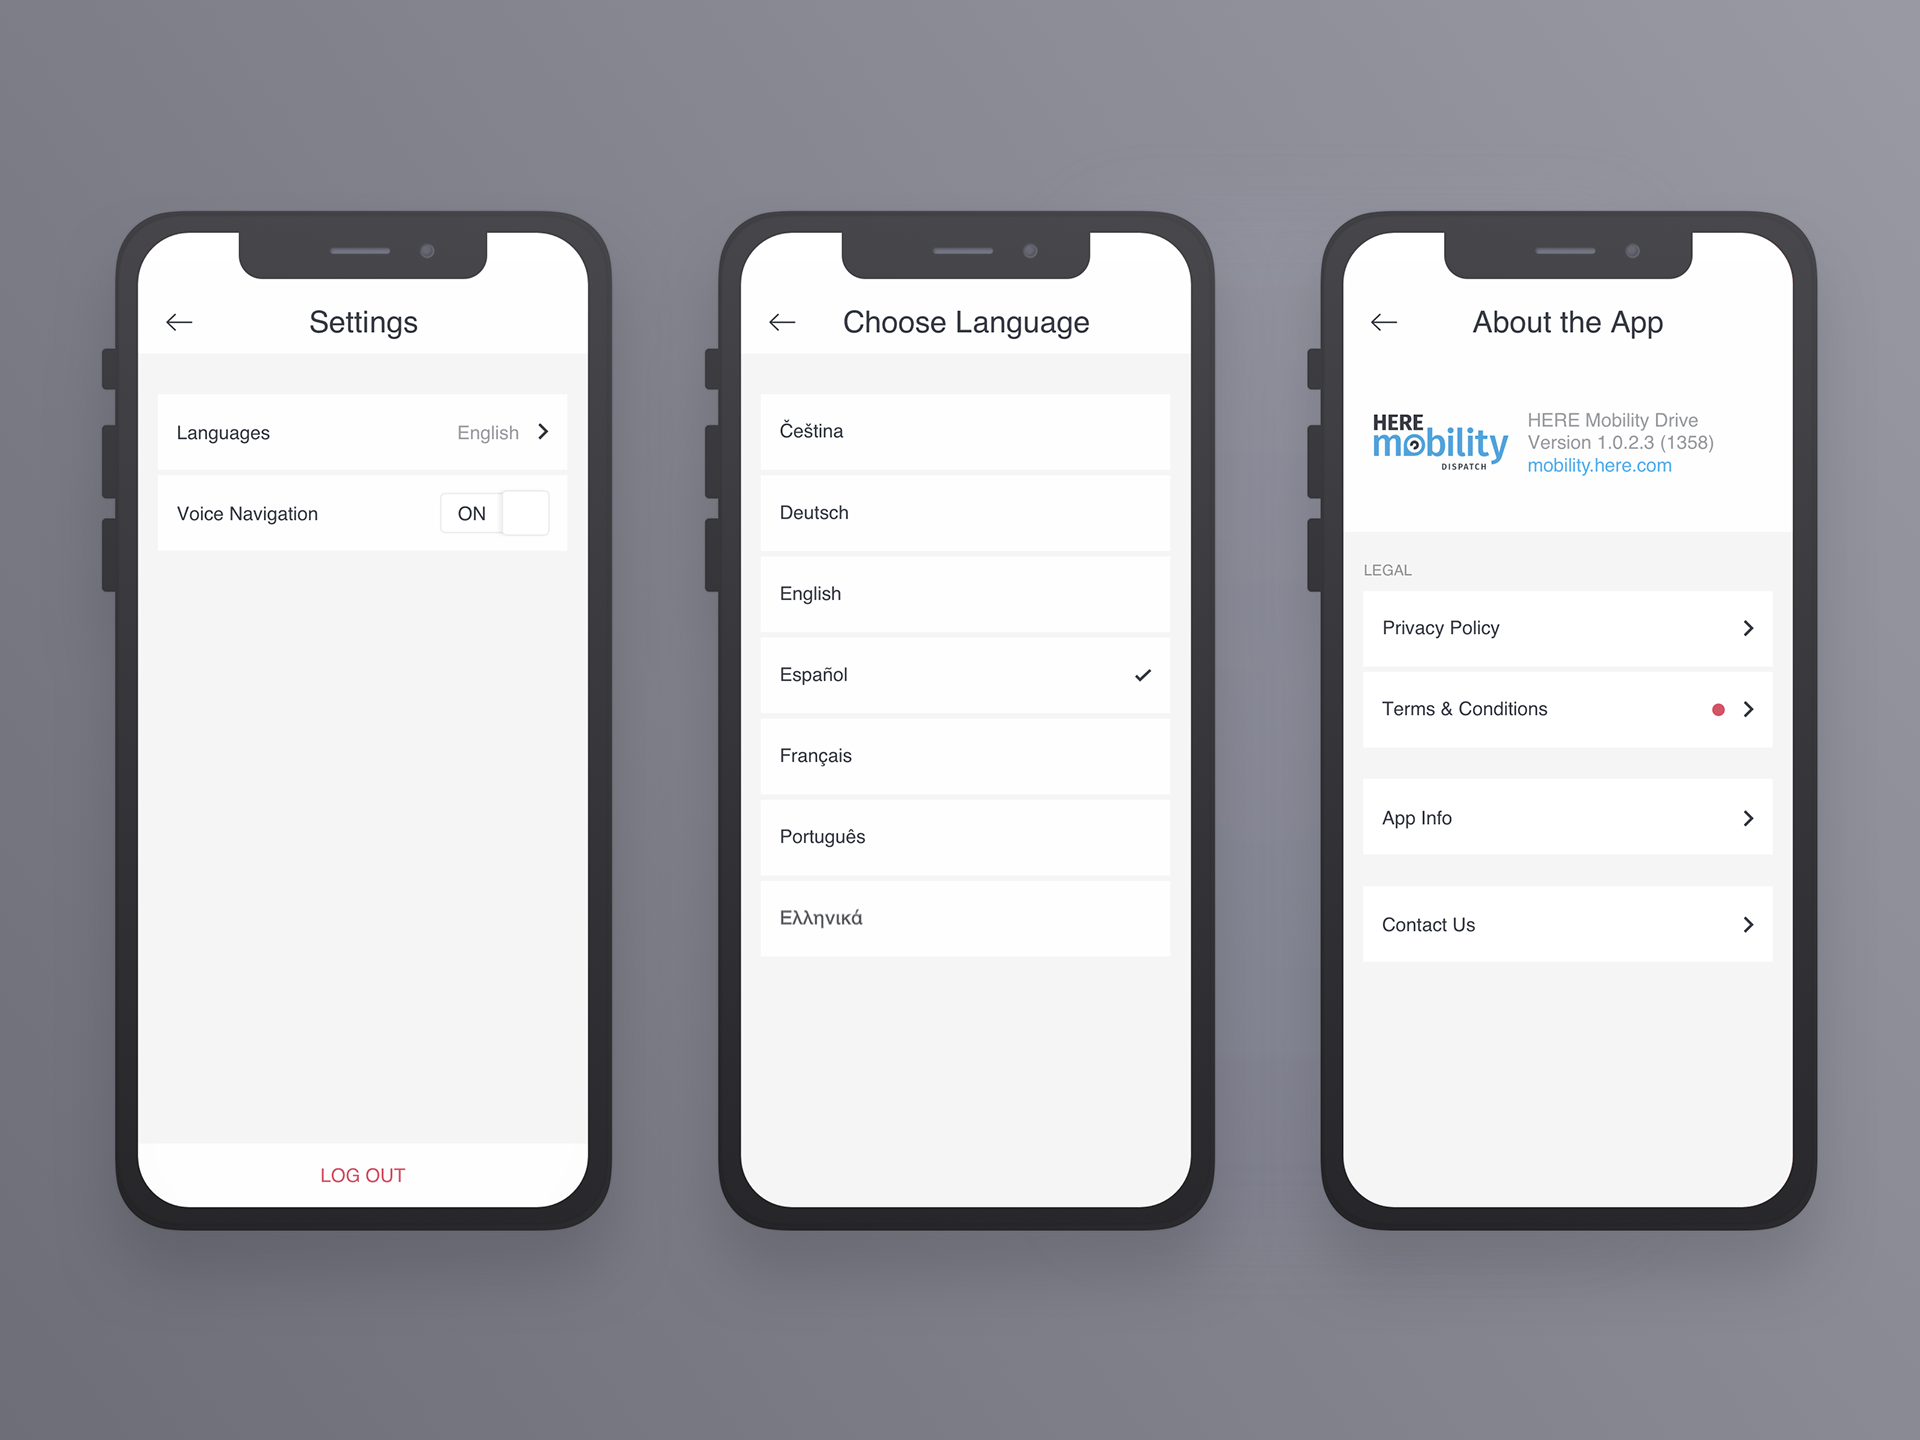
The driver could enter the menu and change some settings, for example the language of the app and sounds. Users can logout from the app and while doing that they will be directed to the login page (see first flow) and will not get rides from the dispatch system.
In the about page the user can read some legal data about terms and conditions, or contact the support team.
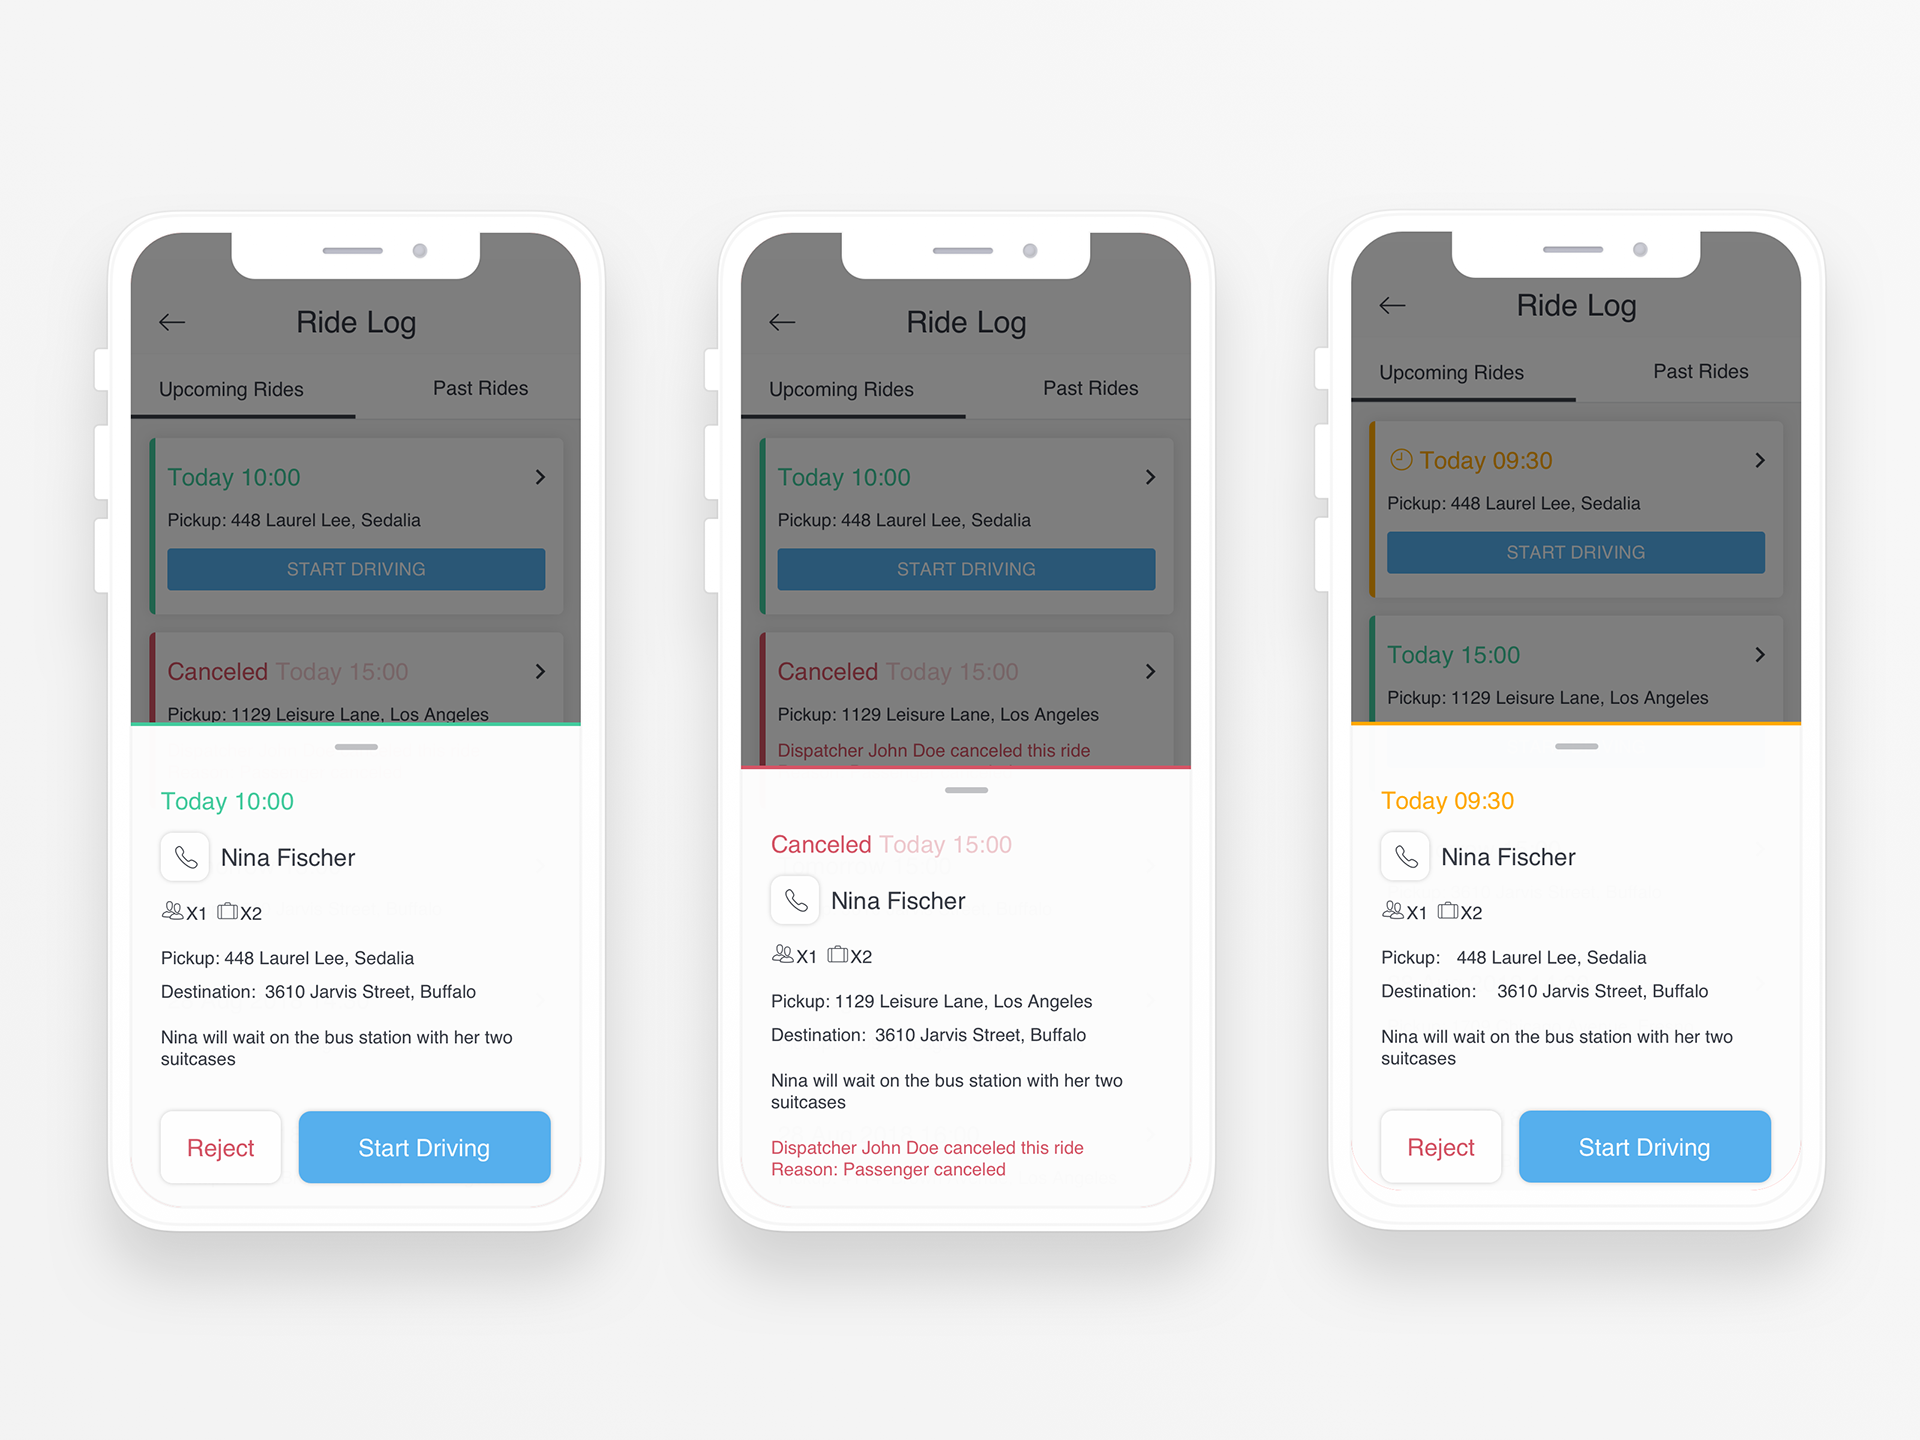
Sixth flow / Upcoming rides and rides history
Through the menu, users could see the pre-booked upcoming rides and the ride history.
In the upcoming ride section, drivers could find the rides that scheduled for today, which will appear in green. The driver could click on each to see more details about the ride. The driver also could activate the ride or reject it. After rejecting a ride, a message will be sent to the web dispatch system, which will ask another drivers to take the ride.
Drivers would also find in this page, the next days planned rides, and the rides that scheduled but canceled by the dispatcher, which will appear in red.
The third kind of indication marked in orange, which urges the driver to start the ride since the navigate to the pickup point should start soon.
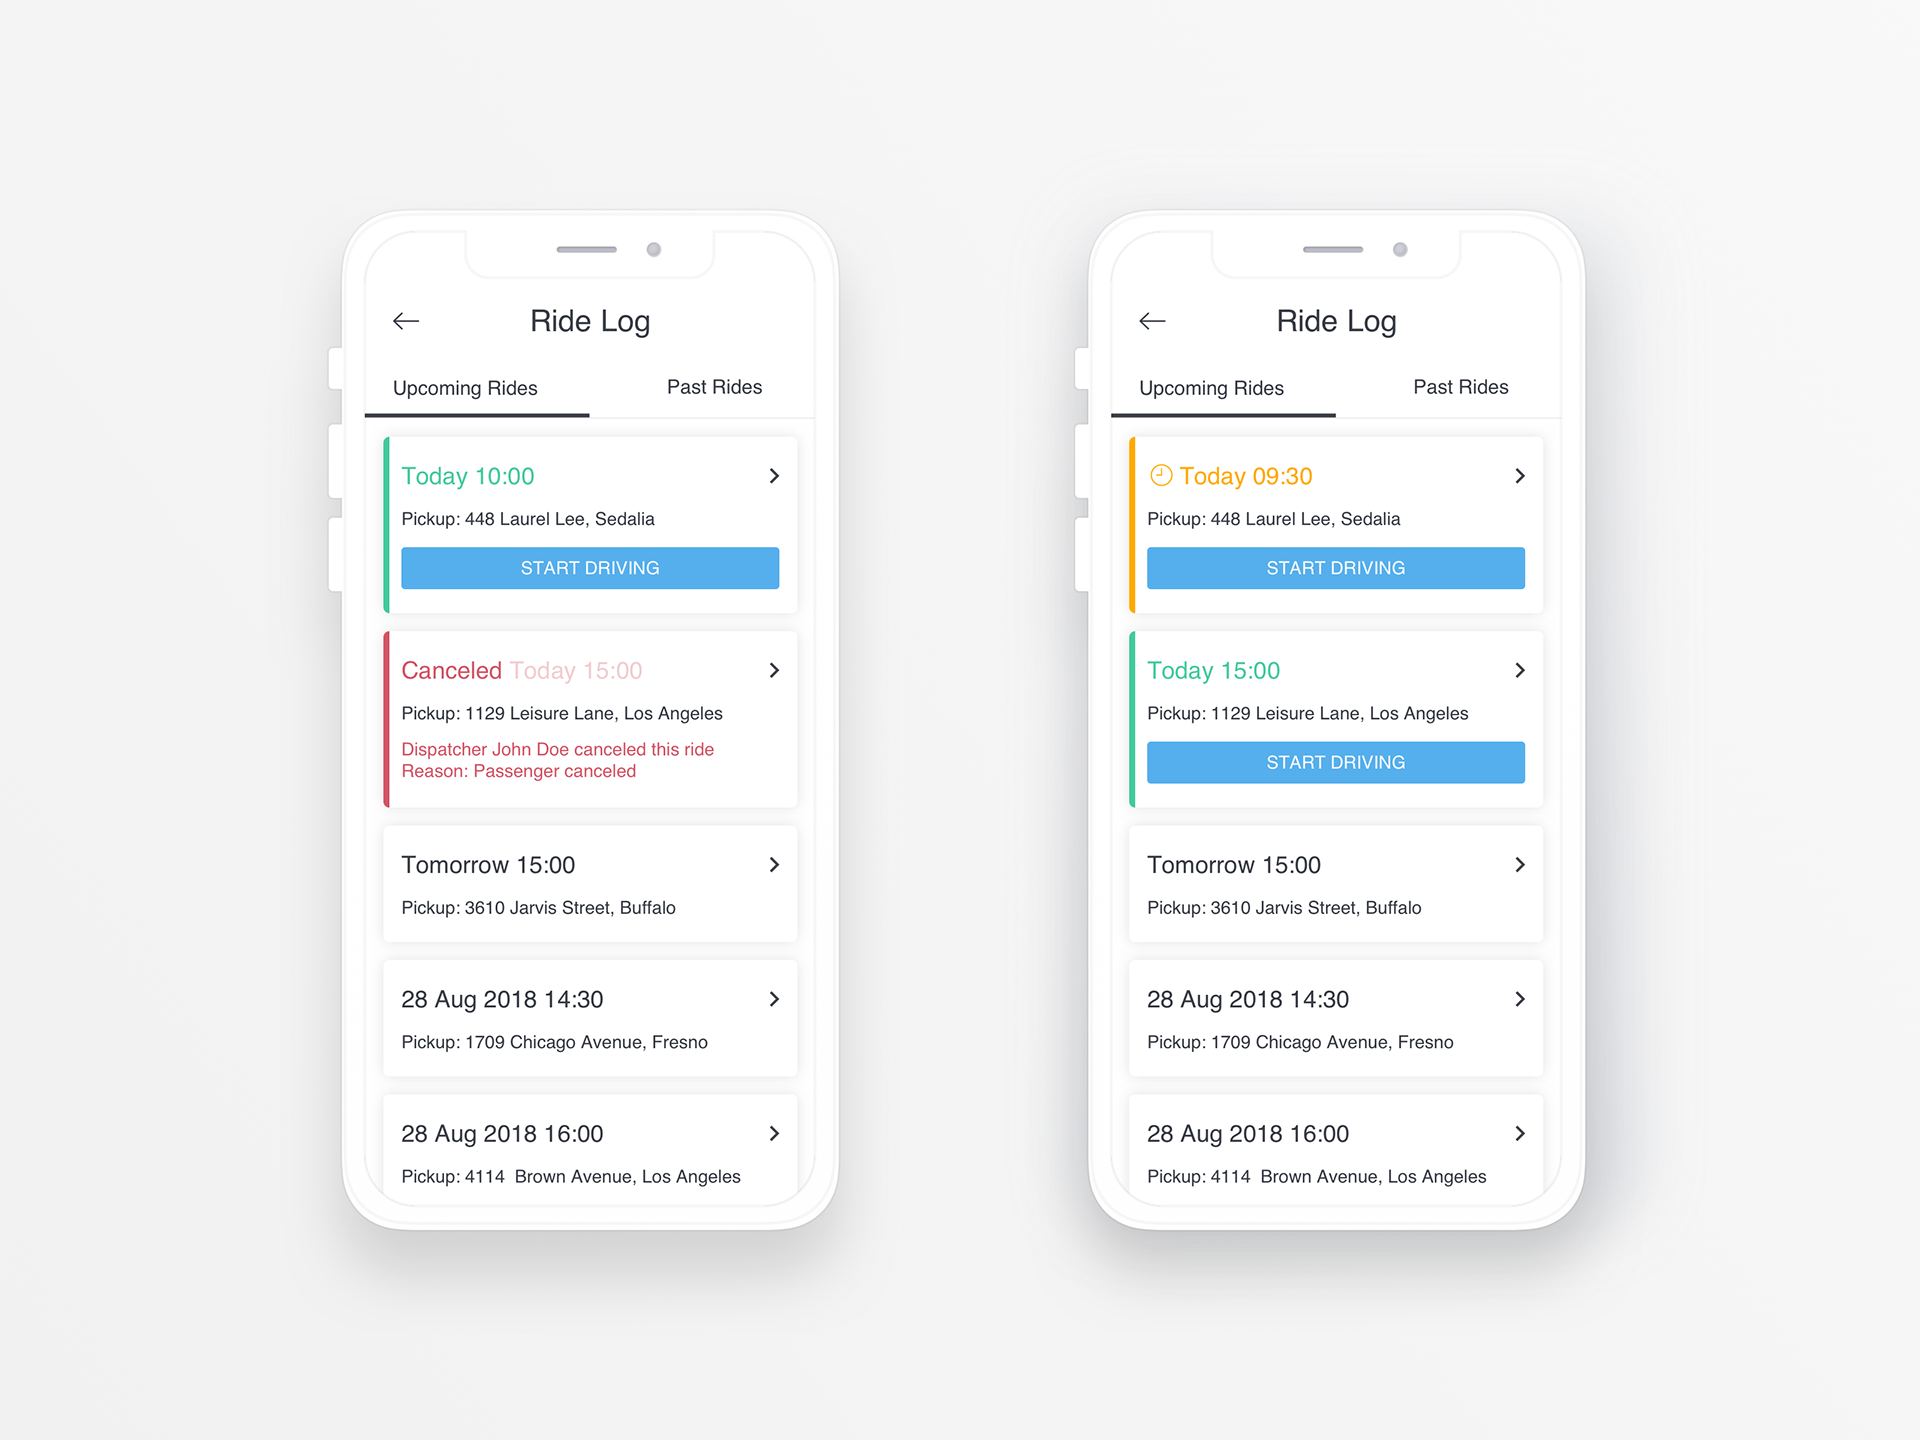

To see previous rides, users could enter the "Past Rides" section and see all the days that were on a shift. By clicking on each day, the driver could find some detailed information about the ride, for example, the duration of the. ride, the pickup and destination addresses, the type of the ride (street hailing, manually allocated...), and more.

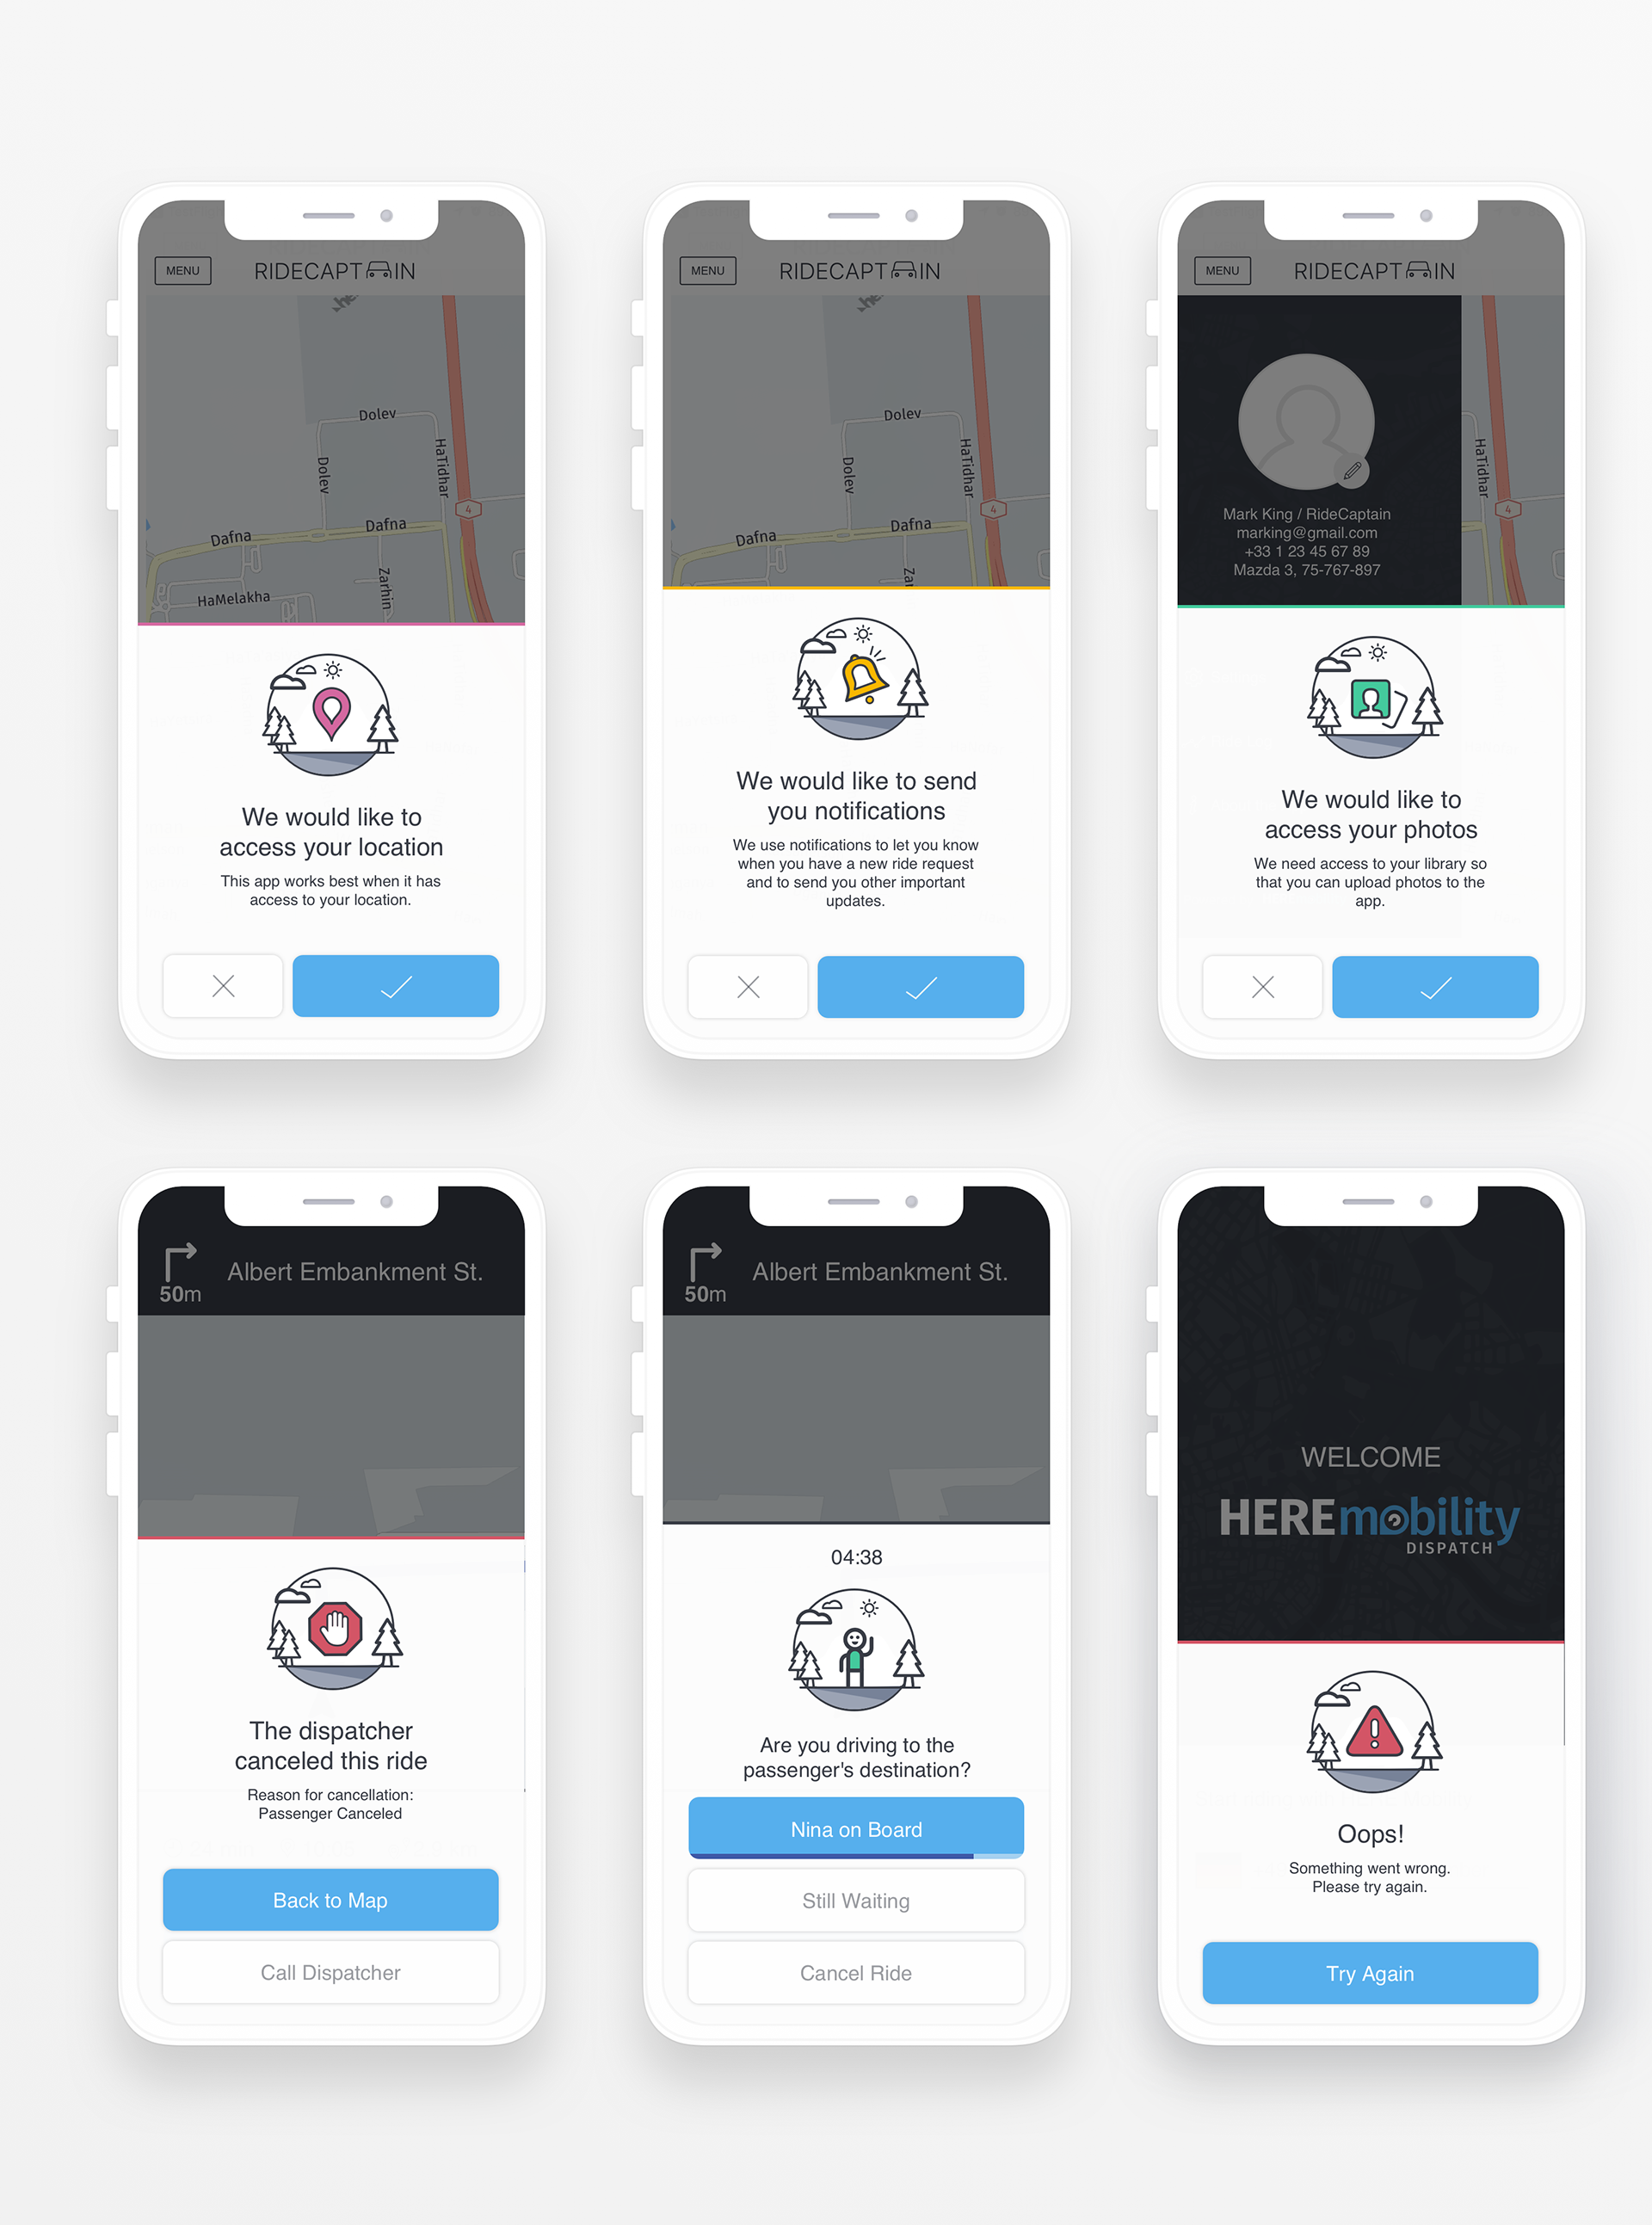
Seventh flow / Alerts and messages in the app
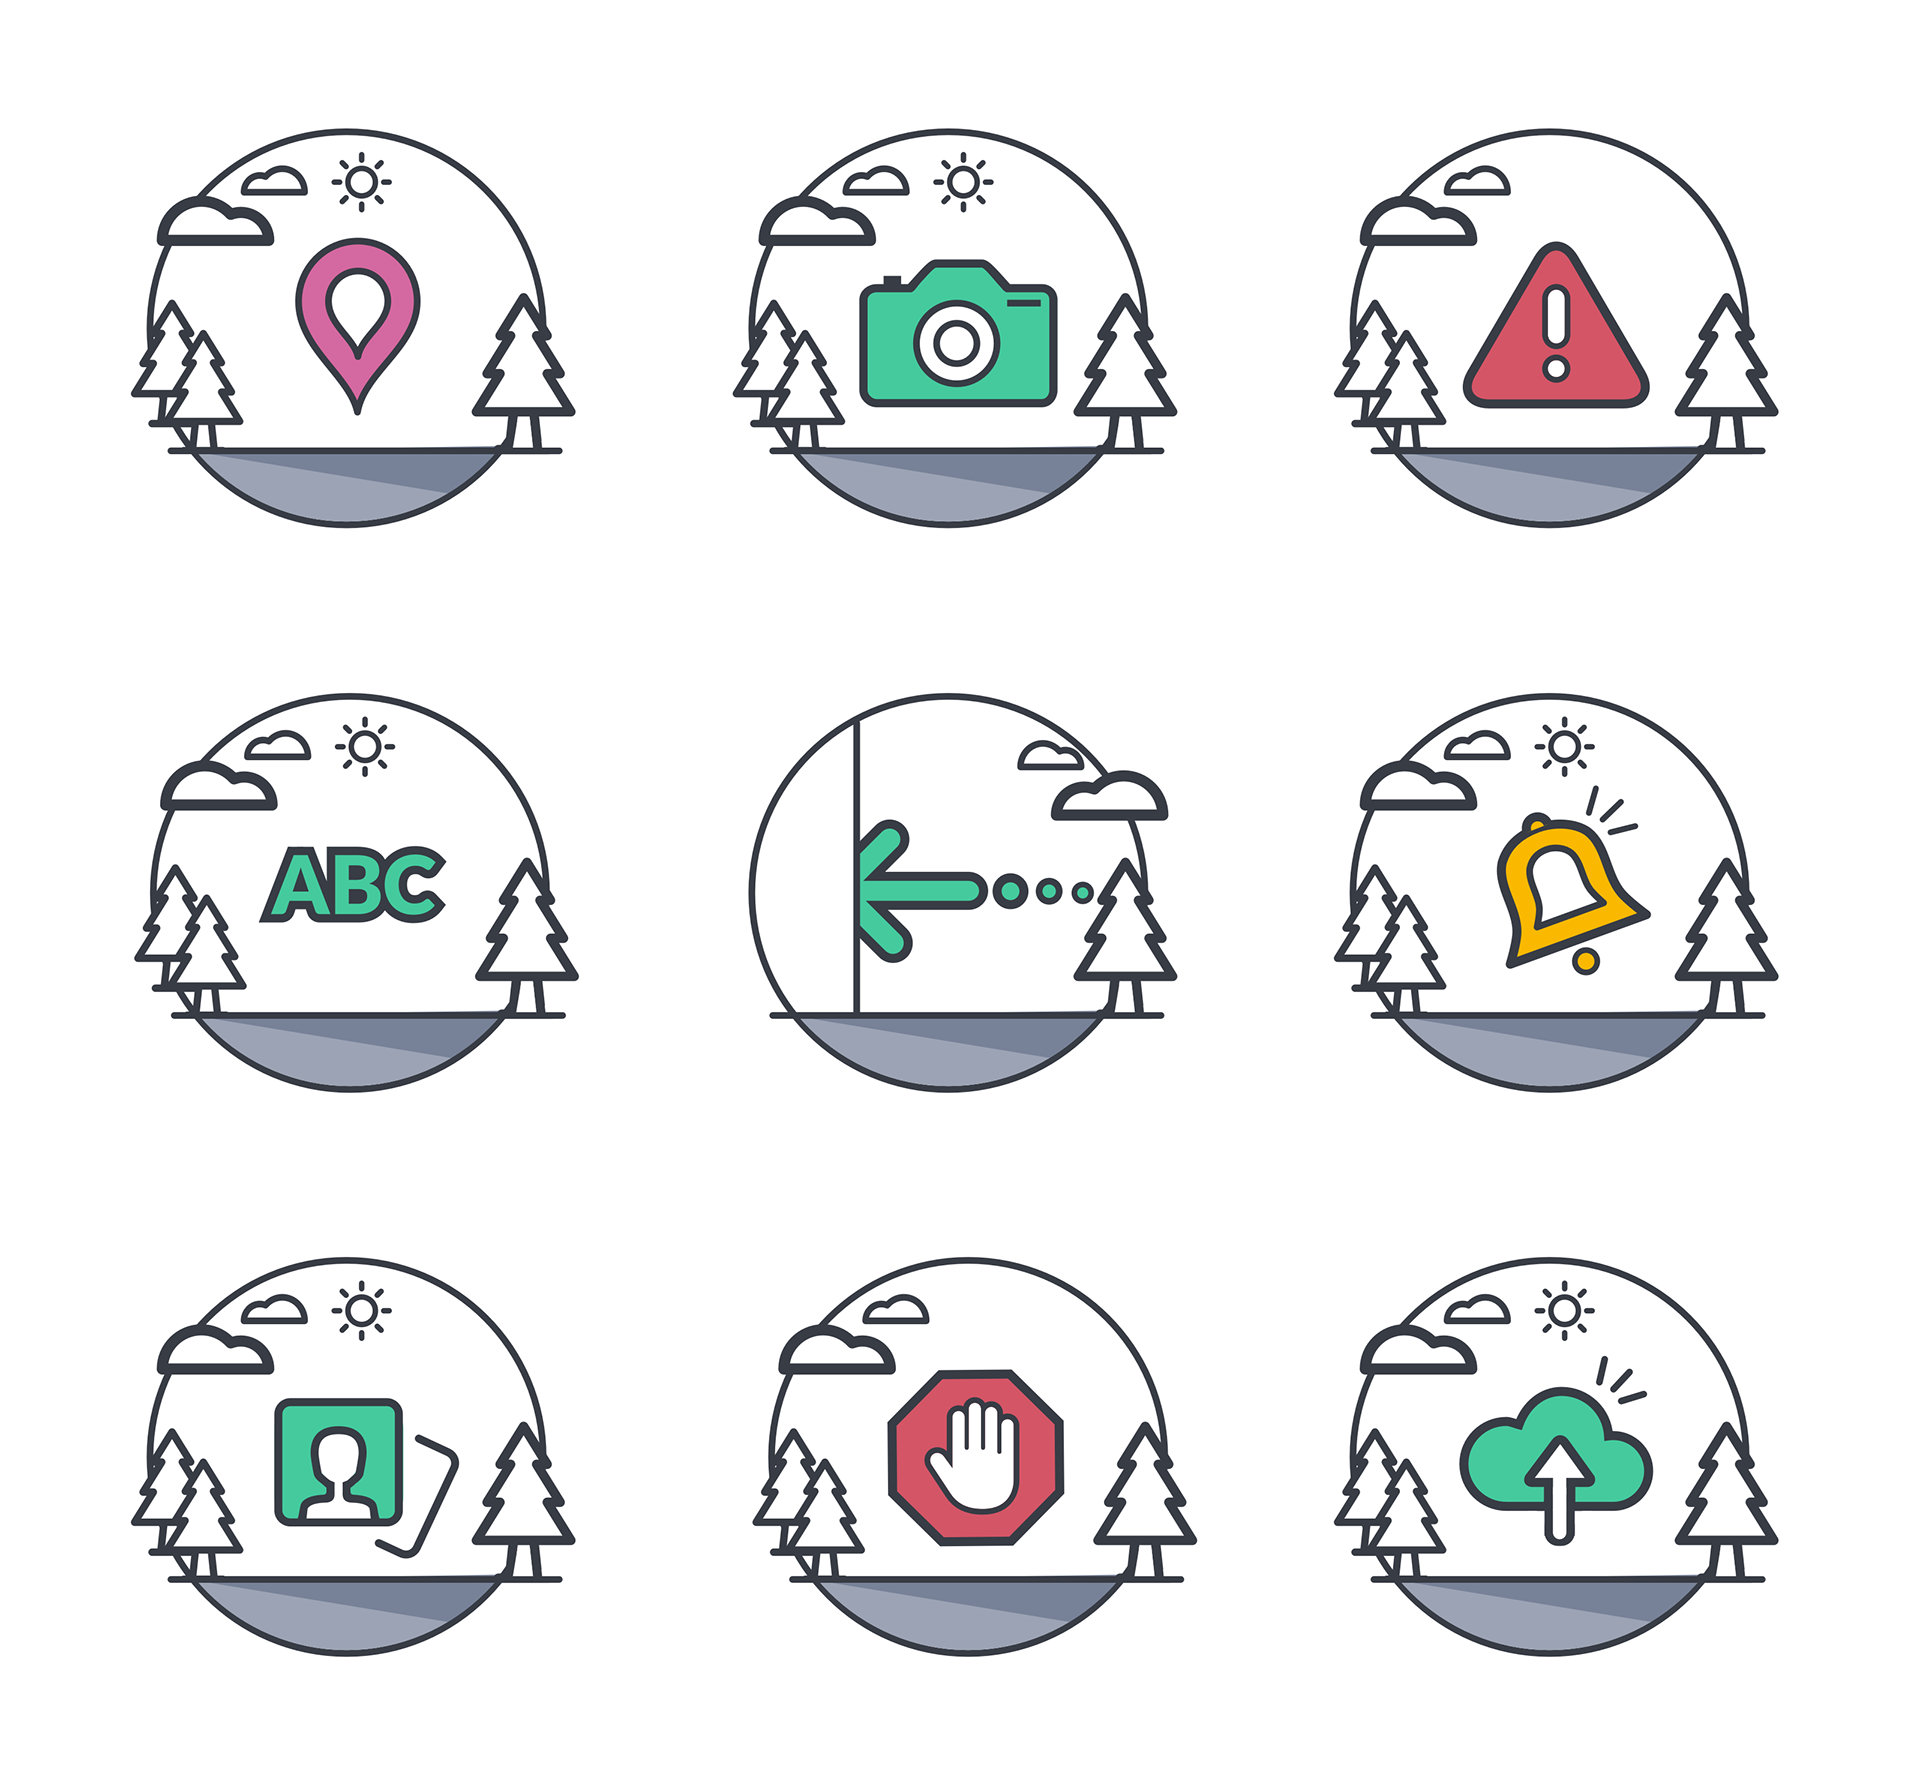
In the application we created a unique experience for the communication of the app with the driver.
Each illustration indicates a scenario which appears in the app: